
Last updated September 24, 2026
DIY vs Professional Insulation: The Palo Alto Homeowner’s Decision Guide
Home Depot rents blown insulation machines for roughly $200 a day, and bags of cellulose run about $30 each. A homeowner can insulate a 1,500-square-foot attic floor for under $800 in materials. They can also spend that $800 on insulation that performs at 40% of its rated R-value because the top-plate air leakage was never sealed, and have no way of knowing it without equipment they don’t own. In Palo Alto, where summer heat spikes above 90 degrees and winter nights dip into the 30s, that undetected performance gap shows up on your PG&E bill every month. This guide walks you through what you can genuinely handle yourself, what requires professional equipment and training, and how to verify the work was done right - whether you did it or hired it out.
Quick Answer
Most Palo Alto homeowners can handle attic hatch weatherstripping, kneewall batt installation, and basic crawlspace vapor barrier work themselves. Anything involving air sealing of top plates, blower-door-directed leak detection, or dense-pack wall insulation requires professional equipment to perform correctly and verify. If your home was built before 1978, has HVAC equipment in the attic, or contains knob-and-tube wiring, DIY insulation work creates safety and code-compliance risks that exceed any material savings.
Table of Contents
- What Homeowners Can Do Well Without Professional Equipment
- What Requires Professional Equipment to Do Correctly
- The Palo Alto Climate Factor: Why R-Value Alone Misleads
- The Specific Liability Exposure for DIY Insulation in Palo Alto
- Decision Matrix: When DIY Makes Sense and When It Doesn’t
- How to Verify Professional Work Was Done Correctly
- Cost Breakdown: DIY Materials vs. Professional Installation in Palo Alto
- Common Mistakes to Avoid
- When to Call a Professional
- Frequently Asked Questions
What Homeowners Can Do Well Without Professional Equipment
Some insulation work is genuinely accessible to motivated homeowners with basic tools and a free weekend. The key is matching the task to what you can verify with your own eyes and a $20 hardware-store thermometer.
Attic Hatch Weatherstripping
The attic hatch is the most overlooked thermal bypass in Palo Alto homes, especially in the Eichler and ranch-style builds common in Greenmeadow and Midtown. A 1/4-inch gap around a standard 30-by-30-inch hatch leaks as much conditioned air as a 6-inch square hole in your wall. The fix is straightforward: adhesive foam gasket tape around the hatch perimeter, plus insulation board glued to the hatch itself. Cost is under $40. Verification is simple - on a hot afternoon, the hatch should feel roughly the same temperature as the conditioned space below, not warm to the touch.
Kneewall Batt Installation
In Palo Alto’s older two-story homes, particularly in Professorville and the areas near downtown, kneewalls - the short walls under sloped ceilings on upper floors - are often uninsulated. Fiberglass batts fit this application well because the cavities are open and accessible from the attic side. You’ll need: batts sized to the cavity width (typically 16 or 24 inches on center), a utility knife, a straightedge, and a dust mask. The critical detail most homeowners miss: the batt must completely fill the cavity without compression, and the facing (if present) goes toward the conditioned space in heating climates. In Palo Alto’s mixed climate, unfaced batts with a separate vapor-smart membrane are the safer choice.
Accessible Crawlspace Vapor Barrier
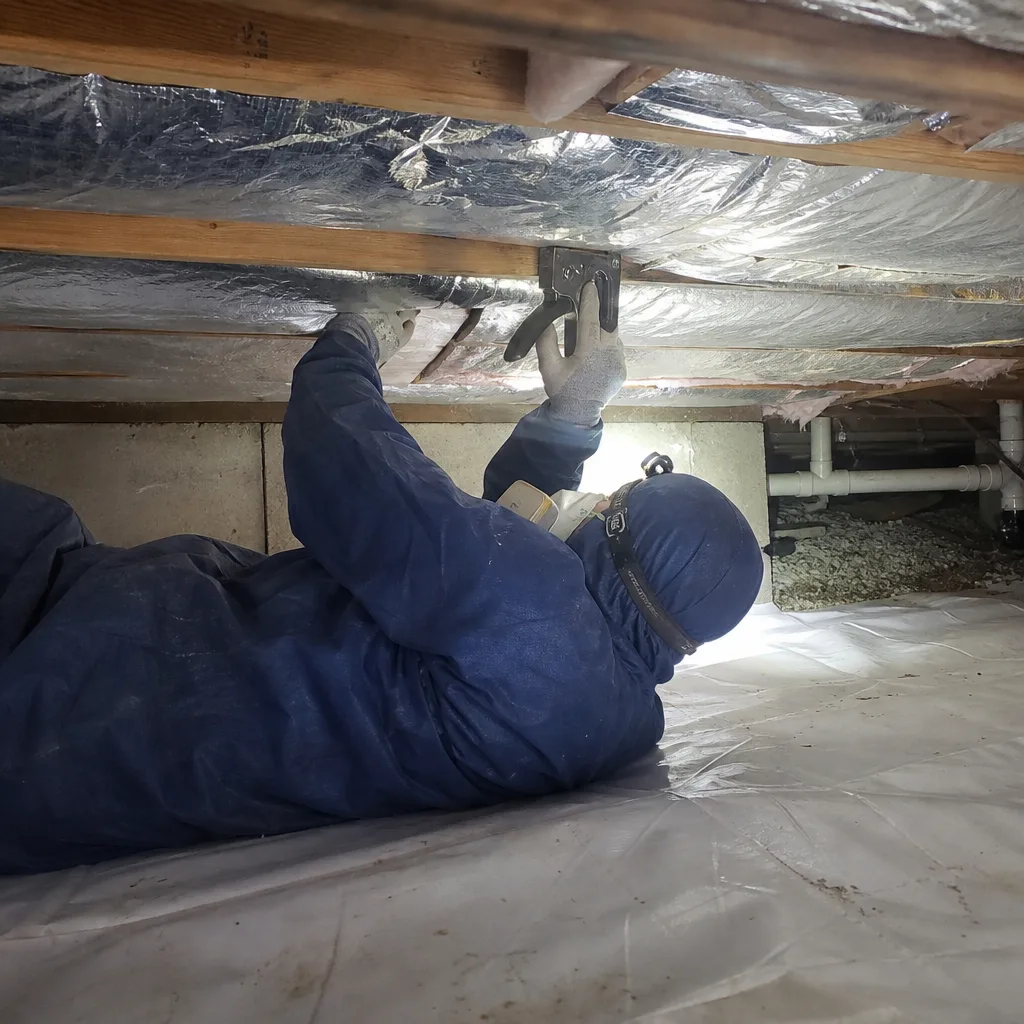
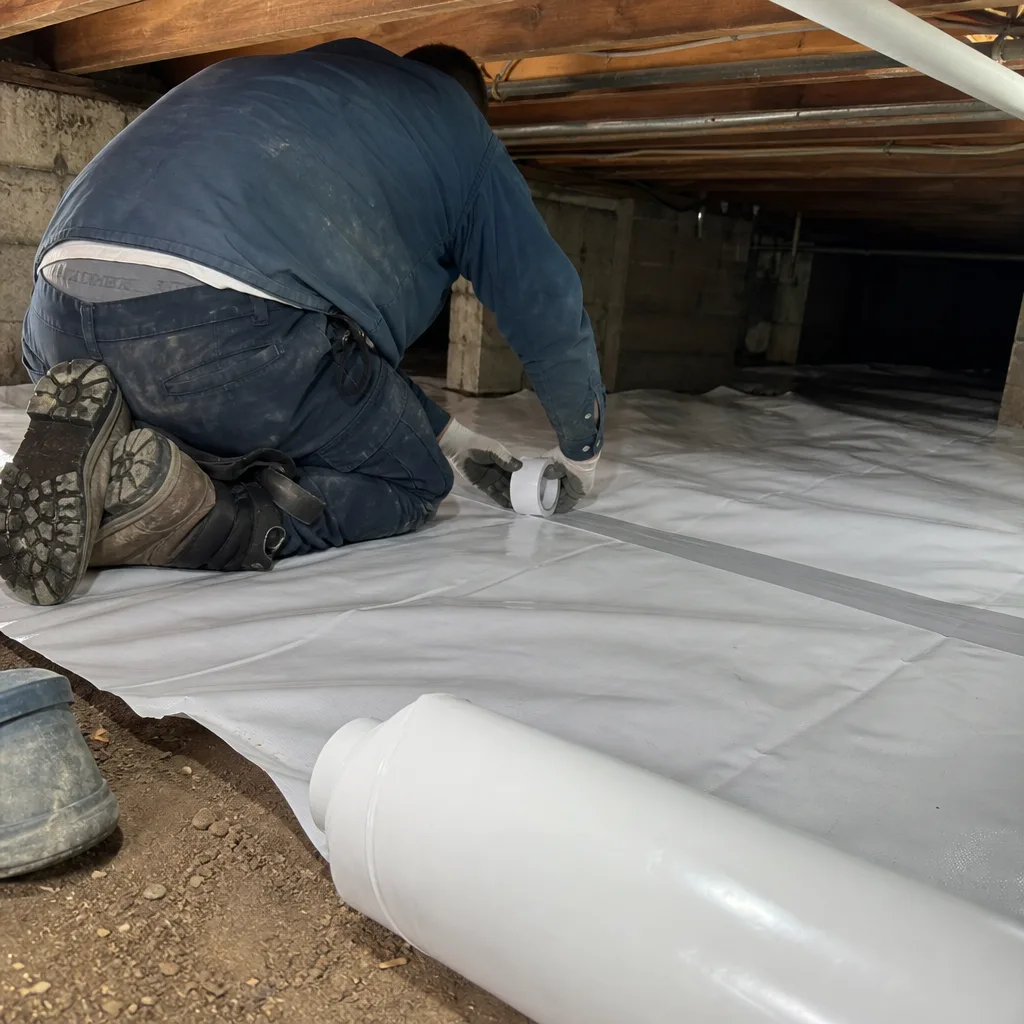
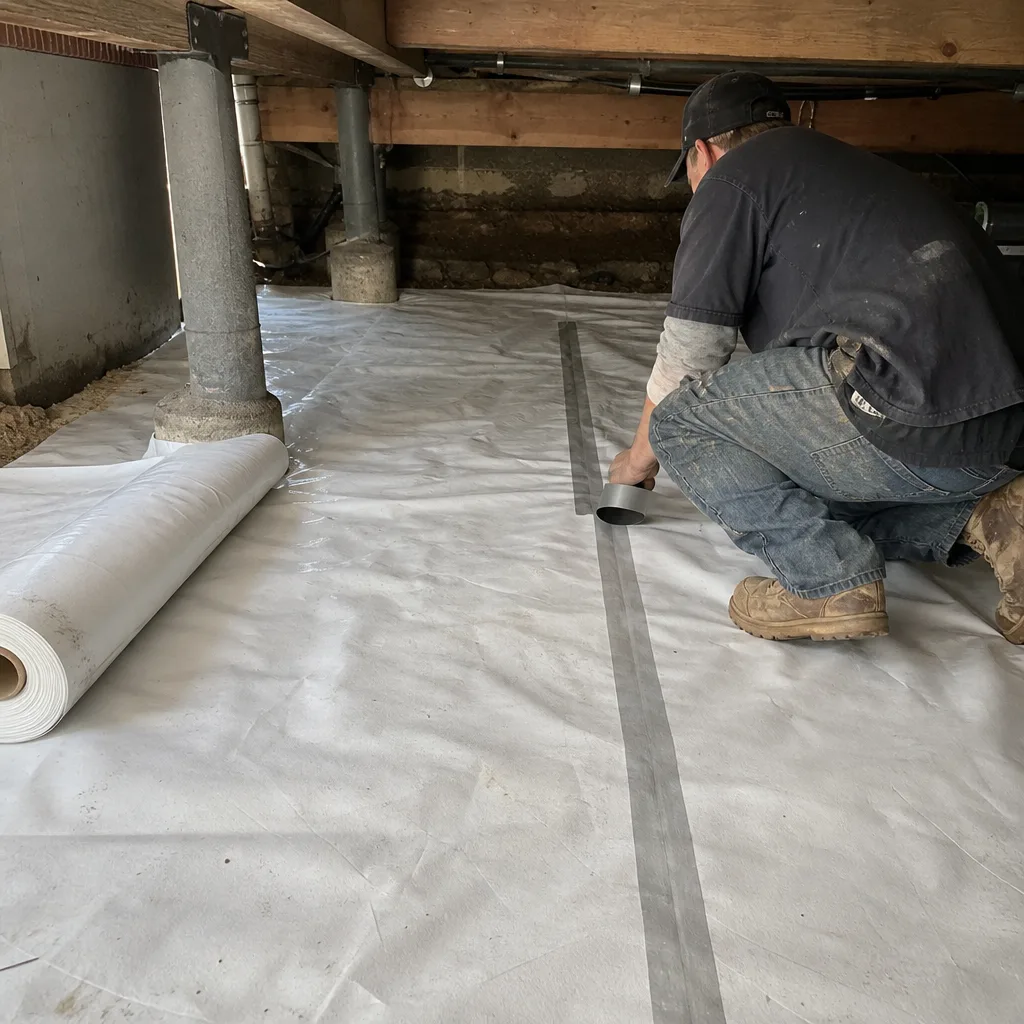
Homes in Old Palo Alto and the flatlands near San Francisquito Creek often have vented crawlspaces with bare dirt floors. A 6-mil polyethylene sheet, overlapped 12 inches at seams and run 6 inches up foundation walls, cuts moisture load significantly. This matters because crawlspace moisture migrates upward into wall cavities and degrades insulation performance. The work is physical but not technical: clear debris, roll out the sheeting, secure with landscape staples, and seal seams with vapor-barrier tape. A 1,200-square-foot crawlspace runs about $200 in materials.
What these three tasks share: they’re surface-level, visually verifiable, and don’t require you to distinguish between an air leak and a thermal bridge. The performance impact is real but incremental. Attic hatch sealing might save $50-80 annually on heating and cooling. Kneewall insulation in a 400-square-foot conditioned attic space might cut that zone’s load by 15-20%. Vapor barrier installation reduces humidity-driven comfort complaints but doesn’t directly lower your energy bill.
Where DIY insulation stops being sensible is the point where you can’t see the problem you’re solving. That’s where most Palo Alto attics actually live.
What Requires Professional Equipment to Do Correctly
The building science principle that governs insulation performance is this: insulation only works in an airtight boundary. Air moving through or around insulation strips away its effective R-value, sometimes by half or more. The equipment to find and fix those leaks is not available for weekend rental.
Top-Plate Air Sealing with Two-Part Foam
The top plate is the horizontal framing member where wall studs meet the ceiling drywall or roof sheathing. In virtually every Palo Alto home built before 1990, this joint leaks - not because it’s visibly gapped, but because framing lumber shrinks, drywall pulls away, and dozens of electrical and plumbing penetrations break the air barrier. A typical 2,000-square-foot home has 150-200 linear feet of top plate, and unsealed, it leaks the equivalent of a 2-foot-square hole.
Finding these leaks requires a blower-door test - a pressurization reading that shows, in one number, how much air your building envelope is losing. Sealing them requires two-part polyurethane foam (Icynene or Demilec open-cell, or closed-cell equivalents) applied with a proportioning gun that heats and mixes the chemicals at precise ratios. The foam expands into gaps you can’t see from the attic side, where top plates are often buried under existing insulation. Without the blower door running during application, you have no feedback on whether you got the leak. With it, you watch the CFM50 number drop in real time as each penetration is sealed.
We’ve tested homes in Palo Alto’s Barron Park neighborhood where the blower door read 3,800 CFM50 before top-plate sealing and 2,400 after - a 37% reduction in air leakage from work that took four hours and was completely invisible afterward. The homeowner would never have found those leaks with a smoke pencil and a headlamp.
Blower-Door-Directed Air Sealing
The blower door does more than measure total leakage. With the house depressurized to 50 Pascals, a technician walks the attic with an infrared camera and a smoke pencil, watching warm air get sucked through gaps that are invisible to the naked eye. Common finds in Palo Alto attics: chimney chases with no firestop, dropped soffits over kitchen cabinets that open directly to exterior walls, and bathroom fan housings that vent into the attic instead of through the roof.
Each of these bypasses represents conditioned air you’ve already paid to heat or cool, escaping directly to the attic. A homeowner without a blower door can caulk visible gaps all day and miss the largest leaks entirely. The equipment cost - roughly $4,000 for a calibrated blower door, plus training to operate it - makes DIY acquisition impractical. Rental units exist in some markets, but without training in pressure diagnostics and infrared interpretation, the data is misleading at best.
Dense-Pack Wall Insulation
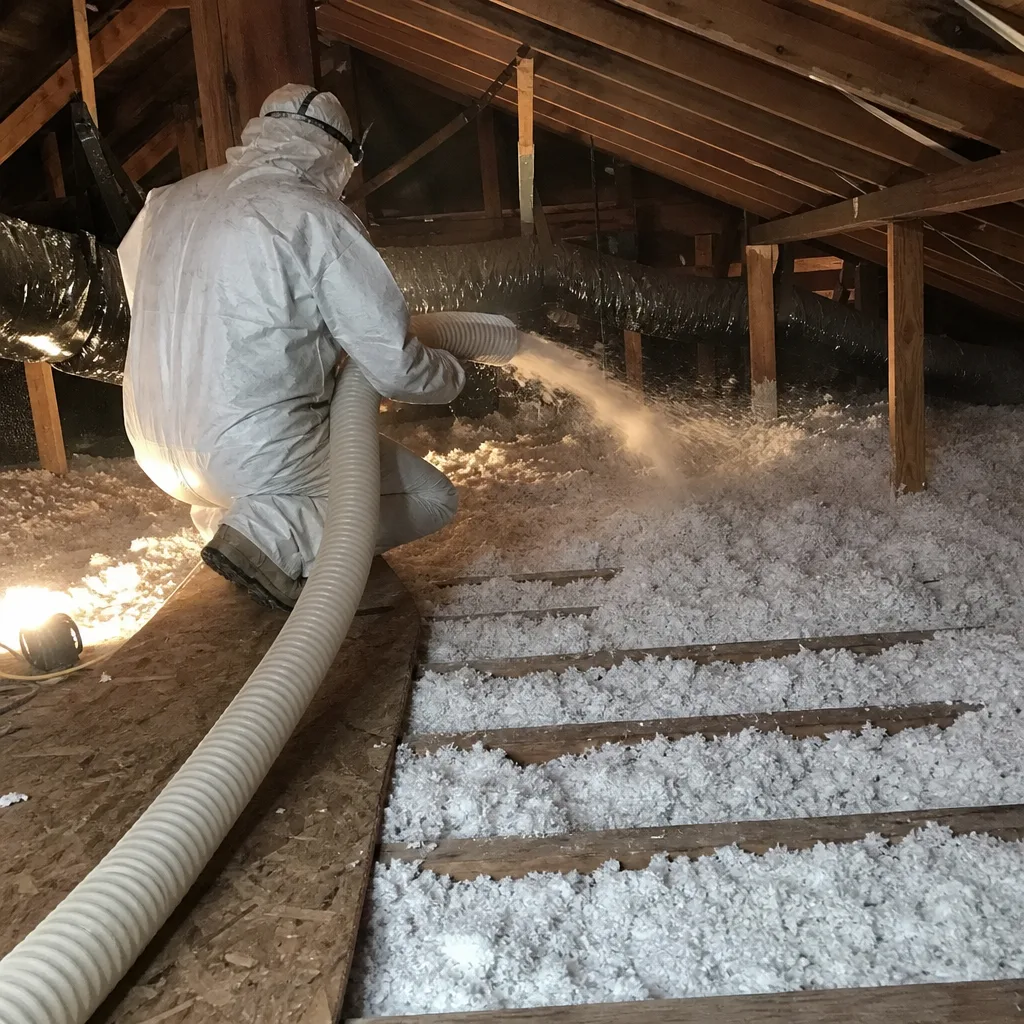
Palo Alto’s older stock - the 1920s bungalows in Professorville, the 1950s ranch homes in Green Acres, the Eichlers in Fairmeadow - often has empty stud cavities or degraded original batts. Dense-pack cellulose (GreenFiber or equivalent) fills these cavities at 3.5 pounds per cubic foot, creating an air-blocking, sound-deadening insulation layer. The installation requires a specialized hose and blower that feeds material at high pressure while a technician monitors cavity fill through strategic access holes.
Underfilled cavities settle and create voids. Overfilled cavities bulge drywall or blow out plaster. The density must be verified by feel and by calculated fill rate - a judgment that comes from hundreds of installations. We’ve corrected DIY dense-pack attempts in Palo Alto where the homeowner achieved 1.8 pounds per cubic foot, leaving the wall essentially uninsulated despite the material cost and labor.
The Palo Alto Climate Factor: Why R-Value Alone Misleads
Palo Alto sits in Climate Zone 3C - marine-influenced, with mild, wet winters and warm, dry summers. The design heating load is modest compared to Midwestern cities, but the cooling load is increasingly significant. July and August days now regularly reach the upper 80s, and September heat waves are common. This matters for insulation strategy in ways that simple R-value charts don’t capture.
In heating-dominated climates, insulation’s job is straightforward: slow conductive heat loss from warm interior to cold exterior. In Palo Alto’s mixed climate, the bigger problem is often air leakage during cooling season - warm, humid outdoor air infiltrating the attic, condensing on cool ductwork or roof sheathing, and causing moisture damage that insulation alone can’t prevent. We’ve opened attics in Old Palo Alto where R-38 fiberglass batts were performing like R-15 because summer moisture had degraded the binders and compressed the material.
The California Energy Code (Title 24) now requires specific air-sealing measures in addition to minimum R-values for any altered attic or wall assembly; see our Insulation Permits, Codes & Inspections in CA: What You Need to Know for details. For Palo Alto homeowners, this means that even a technically code-compliant R-value installation can fail inspection if the air barrier isn’t addressed. The code recognizes what field data confirms: in this climate, airtightness often matters more than incremental R-value.
Our approach on every attic insulation job in Palo Alto follows this sequence: blower-door test to establish baseline, air sealing of all accessible bypasses, second blower-door test to verify reduction, then insulation installation. The before-and-after numbers go on the job record. Without that sequence, you’re guessing at performance.
The Specific Liability Exposure for DIY Insulation in Palo Alto
Palo Alto’s real estate market creates a unique liability environment for unpermitted or unverified insulation work. The median home sale price exceeds $3 million, and buyers conduct thorough due diligence. A failed inspection or disclosure issue can cost far more than the original professional job.
Permit and Disclosure Obligations
California requires disclosure of unpermitted work on the Transfer Disclosure Statement (TDS). In Palo Alto, where many buyers are tech-industry professionals with inspection contingencies and legal representation, an unpermitted insulation upgrade in the attic can trigger a request for full permit history, engineering review, or price reduction. We’ve been called to document and permit-retrofit DIY work in Crescent Park and Duveneck/St. Francis that the seller completed three years earlier, never imagining it would complicate a $4.5 million transaction.
Specific triggers for permit requirements in Palo Alto:
- Any alteration to the thermal envelope of a conditioned space (attic, walls, crawlspace) exceeding specific area thresholds
- Work involving spray foam insulation, which requires fire-rating verification and ignition-barrier inspection
- Insulation installation in homes with knob-and-tube wiring, which requires electrical inspection for clearance and contact
- Crawlspace work that alters ventilation or moisture management, which may trigger building department review for foundation and drainage compliance
The permit cost for attic insulation in Palo Alto is typically $200-400. The cost of a failed sale inspection, or a buyer’s demand for professional remediation and re-inspection, runs $3,000-8,000.
Insurance and Warranty Implications
Homeowner’s insurance policies in California increasingly exclude coverage for damage arising from unpermitted alterations. A DIY spray foam installation that off-gasses improperly, or a cellulose dense-pack that blocks soffit ventilation and causes roof deck rot, may not be covered. Professional contractors carry general liability and workers’ compensation; your homeowner’s policy does not extend to cover your own construction errors.
The 365-Day Done Right Promise we provide - if it’s not done right, we make it right - exists because the work is documented, permitted where required, and backed by a written warranty delivered before anyone starts. DIY work has no comparable backstop.
Decision Matrix: When DIY Makes Sense and When It Doesn’t
Use this framework based on home characteristics, not your confidence level with tools. We’ve applied it across thousands of Palo Alto-area assessments since 2016.
| Home Characteristic | DII Viable? | Why |
|---|---|---|
| Built 1990 or later, no prior insulation work | Limited - attic hatch, kneewalls only | Top plates likely sealed at construction; main risk is disturbing existing air barrier |
| Built 1978-1989, original insulation | No - professional assessment required | Pre-Title 24 compliance; air sealing almost certainly inadequate; possible asbestos in vermiculite |
| Built pre-1978, any original features | No - safety and code barriers | Lead paint, asbestos, knob-and-tube wiring; all require abatement-licensed handling |
| HVAC equipment in attic | No - professional only | Duct leakage and air handler location create complex interactions; DIY insulation can block combustion air or condensate drainage |
| Knob-and-tube wiring present | No - fire hazard | Insulation contact with active K&T violates NEC and local amendments; requires electrician sign-off |
| Prior insulation, unknown provenance | No - assessment first | May contain asbestos, urea-formaldehyde, or improperly installed material; disturbance releases fibers |
| Flat or low-slope roof (common in Eichlers) | No - specialized application | Limited attic space, roof deck insulation, and moisture management require spray foam expertise |
| Accessible crawlspace, no HVAC, no electrical hazards | Yes - vapor barrier, basic sealing | Surface work, visually verifiable, low consequence of error |
The pattern is clear: DIY insulation makes sense for supplementary, surface-level work on simple, modern, hazard-free homes. For anything involving the primary thermal envelope, unknown existing conditions, or safety-critical systems, the threshold for professional work is not about your skill with a staple gun. It’s about equipment you can’t rent and verification you can’t perform.
How to Verify Professional Work Was Done Correctly
You don’t need to be a contractor to confirm your insulation installer delivered what you paid for. You need to know what documentation to request and what visual checks to perform before the crew leaves.
Step 1: Review the Written Scope Before Work Starts
Under Haven Standard Clause 1, every job begins with a written price, a written scope, and a written warranty. The scope should specify: insulation type and brand (Owens Corning, Johns Manville, Knauf, Rockwool, CertainTeed, Icynene, Demilec, or GreenFiber), installed R-value or depth, air-sealing locations, and cleanup responsibilities. If the scope says “insulate attic” without specifying material, depth, or preparation, you don’t have a scope. You have an invoice waiting to happen.
Step 2: Inspect Top Plates Before Insulation Goes In
On the day of installation, ask to see the attic before the new material covers the floor. The top plates - where walls meet ceiling - should show gray or beige foam sealant at electrical penetrations, plumbing stacks, and the plate-to-drywall joint. The foam should be flush or slightly proud, not recessed into gaps. Chimney chases should have metal firestops, not foam (foam is combustible). Bathroom fan housings should be sealed to the drywall and vented through the roof, not into the attic.
Take your own photos. These are your verification record if performance doesn’t match expectation.
Step 3: Read the Blower-Door Report
For any job involving air sealing, the contractor should provide before-and-after blower-door readings in CFM50 - cubic feet per minute at 50 Pascals pressure. A meaningful improvement for a 2,000-square-foot Palo Alto home is typically 20-35% reduction. Below 15% suggests incomplete sealing; above 40% suggests either exceptional prior leakage or measurement error (ask for the test photos showing the manometer reading).
The report should also note the building volume and the calculated air changes per hour at 50 Pascals (ACH50). For retrofits, 5-10 ACH50 is common post-work target. Below 3 ACH50 approaches new-construction tightness and may require mechanical ventilation - a conversation worth having, not a number to pursue blindly.
Step 4: Cross-Check Installed Depth Against the Job Ticket
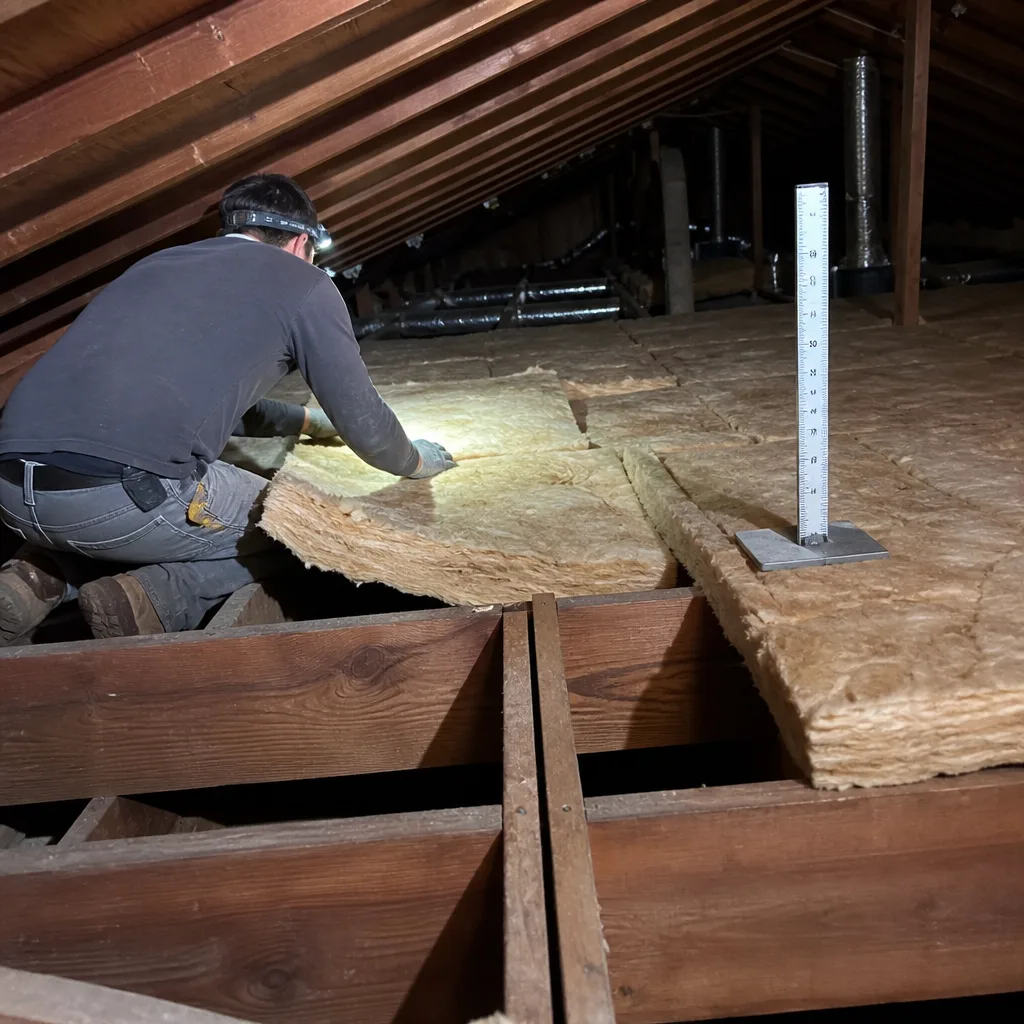
For blown-in attic insulation, depth is the verifiable proxy for R-value. The job ticket specifies target depth - typically 14-16 inches for R-38 cellulose, 10-12 inches for fiberglass. Use a yardstick or tape measure at six locations: near the attic hatch, at the center, and near each corner. Depth should be within 1 inch of target, with no thin spots over top plates or near eaves. For topside attic insulation in Palo Alto homes, uniform depth matters more than maximum depth; a 20-inch pile over the center and 8 inches at the eaves is worse than 14 inches everywhere.
Step 5: Confirm the Documented Photo Record
Every job we complete includes a Documented Photo Record - before, during, and after images, delivered with the final invoice. This isn’t an extra; it’s standard documentation. If your contractor doesn’t provide it, you have no evidence of what was done if a future inspection, sale, or performance issue arises.
Cost Breakdown: DIY Materials vs. Professional Installation in Palo Alto
Direct cost comparison is complicated by the performance gap: DIY materials at full rated R-value versus DIY materials at degraded effective R-value due to unsealed leaks. See our Insulation Cost Breakdown: The Palo Alto Homeowner’s Reference for 2026 for the honest math.
DIY Attic Insulation: Materials Only
- Cellulose insulation (GreenFiber or equivalent): $30-35 per 25-lb bag, approximately 20 bags for 1,500 sq ft at R-38 = $600-700
- Machine rental: $200/day
- Basic weatherstripping, caulk, foam gun: $75-125
- Respirator, gloves, lighting: $50-75
- Total: $925-1,100
What this doesn’t include: blower-door test ($300-450), two-part foam and proportioning gun for top-plate sealing ($400-600 in materials, gun rental rarely available), infrared camera rental ($150-200/day), permit ($200-400 if required), and the value of 16-24 hours of labor.
Professional Installation: All-Inclusive
Most attic insulation jobs in a Palo Alto home of 1,500-2,500 square feet run between $3,200 and $6,800, depending on:
- Existing insulation condition and removal requirements
- Accessibility (truss spacing, ductwork density, roof pitch)
- Air sealing complexity (number of penetrations, chimney proximity, HVAC location)
- Insulation type (fiberglass blown-in, cellulose, or spray foam)
The professional price includes: blower-door testing, air sealing with appropriate materials, insulation installation to specified depth, cleanup, permit handling where required, and documentation. More importantly, it includes verification - the second blower-door test proving the air leakage reduction, the photo record showing the work, the written warranty backing the performance.
For spray foam insulation in Palo Alto, the range shifts higher - $5,500-12,000 for attic applications - due to material cost and the specialized application equipment. The performance improvement is also greater, particularly for Eichlers and other homes with limited attic space where conventional insulation isn’t feasible.
The break-even calculation depends on energy prices and the performance gap. A DIY installation achieving 60% of rated R-value due to air leakage saves $180-240 annually. A professional installation achieving full rated performance saves $400-600 annually. The payback differential covers the professional premium in 4-7 years, before accounting for comfort improvement, moisture protection, and resale value.
Common Mistakes to Avoid
- Insulating before air sealing. This is the most common and most costly error. Once insulation covers the attic floor, finding and fixing top-plate leaks requires removing material. The sequence matters: seal first, verify with blower door, then insulate.
- Blocking soffit ventilation with insulation. Palo Alto homes with vented attics need continuous airflow from soffit to ridge. Insulation pushed against the roof deck without baffles creates moisture accumulation and winter ice dam risk, even in our mild climate.
- Installing fiberglass batts in contact with knob-and-tube wiring. This is a code violation and fire hazard. Any home built before 1950 in Palo Alto should have electrical inspection before insulation work begins.
- Using the wrong insulation for the application. Open-cell spray foam in a floor cavity exposed to crawlspace moisture absorbs water and degrades. Cellulose in a roof deck application without ventilation risks mold. Match material to location, or hire someone who will.
- Ignoring the attic hatch. A well-insulated attic with an unsealed hatch leaks conditioned air continuously. The hatch is part of the thermal envelope; treat it as such.
- Skipping permit requirements for spray foam. Palo Alto Building Division requires ignition-barrier inspection for spray foam in accessible attics. Unpermitted spray foam can trigger disclosure obligations and buyer concerns that far exceed the permit cost.
- Trusting depth gauges without spot-checking. Blown-in insulation settles 10-15% in the first month. Installers who measure immediately after blowing may report inflated depths. Verify at multiple locations after 48 hours.
When to Call a Professional
Call when the work involves air sealing verification, safety-critical systems, or code compliance - which means most primary envelope work in Palo Alto’s housing stock. Not sure where to start? Read our How to Hire a Insulation Contractor in Palo Alto: A Step-by-Step Guide. Specifically: your home was built before 1990, you can’t confirm prior air sealing was done, HVAC or electrical equipment shares the attic space, you’re considering spray foam or dense-pack wall insulation, or you’re preparing the home for sale and need documented, warranted work.
Topside Attic Insulation Palo Alto offers free estimates in Palo Alto. We’ll assess your attic, run a blower-door test if indicated, and provide a written price before any work starts. Call (650) 352-3577 to schedule.
For homes with crawlspace moisture issues, our crawl space encapsulation and vapor barrier work in Palo Alto follows the same sequence: assess, document, price in writing, execute, verify, and deliver the record.
Frequently Asked Questions
Most attic insulation jobs in a 1,500-2,500 square foot Palo Alto home run between $3,200 and $6,800, including air sealing, blower-door verification, and documentation. Spray foam applications range from $5,500 to $12,000 depending on accessibility and thickness. Call (650) 352-3577 for a written estimate specific to your home - estimates are free.
Only if the existing material is dry, uncompressed, and free of pest debris or mold. In Palo Alto’s older homes, we’ve found decades of accumulated material - some with asbestos content, some degraded by roof leaks - that must be removed before new insulation performs correctly. A visual inspection from the hatch is not sufficient; we pull back material at multiple locations to assess condition.
DIY materials for a standard attic run $925-1,100, but effective performance requires air sealing equipment and verification that adds $850-1,250 in rental or purchase costs. The remaining gap versus professional installation covers labor, warranty, permit handling, and the risk absorption of documented work. For homes without air sealing needs and with modern, accessible attics, DIY can be cost-effective. For most Palo Alto homes, the performance gap between DIY and professional installation erodes the material savings within 4-7 years.
Permits are required for alterations to the thermal envelope exceeding specific thresholds, for spray foam installations, and for work involving electrical or HVAC systems in the attic. The Palo Alto Building Division reviews insulation work for Title 24 compliance. Professional contractors handle permit submission and inspection scheduling; DIY homeowners are responsible for determining applicability and obtaining permits.
You don’t, without a blower-door test. Visible gaps around plumbing stacks or light fixtures are the tip of the iceberg. The largest leaks - top-plate joints, chimney chases, dropped soffits - are hidden by framing and often invisible from the attic side. A blower-door test pressurizes the house and makes leaks detectable with smoke or infrared. We provide before-and-after blower-door numbers on every applicable job so you can see the change.
For attics with adequate access and ventilation, blown-in cellulose (GreenFiber or equivalent) or fiberglass both perform well when paired with thorough air sealing. For Eichlers and homes with limited attic space, open-cell spray foam (Icynene or Demilec) provides air sealing and insulation in one application. For wall cavities, dense-pack cellulose is preferred for its air-blocking density. The “best” material is the one correctly installed to the specified depth with verified air sealing - the brand matters less than the installation quality.
The Bottom Line
The DIY-vs-professional insulation question is not primarily about cost or skill. It’s about whether you can verify that the air barrier is intact before adding insulation, and prove the performance improvement afterward. Most Palo Alto homeowners can handle surface-level work - hatch sealing, kneewalls, vapor barriers - with basic tools and visible verification. Anything involving the primary thermal envelope requires equipment for leak detection, materials for proper sealing, and testing for performance confirmation. In a housing market where unpermitted work can derail a sale, and where energy costs continue rising, the documentation that comes with professional installation is not an upsell. It’s the only way to know what you actually got.
Written by Wes Okafor, Owner at Topside Attic Insulation Palo Alto, serving Palo Alto since 2016.